The Correct Notary Letter Format (With Copy-Ready Examples)

Copy this: your name and address at the top, the date, the recipient’s name and address below that, one sentence stating the letter’s purpose, a factual body in chronological order, then a signature block with your printed name and today’s date. Below all of that, leave 3 to 4 inches of blank space for the notary’s certificate, seal, and signature. That’s the entire skeleton. The one rule that trips people up more than any formatting detail: don’t sign until you’re sitting in front of the notary, and bring a government-issued photo ID that matches the name on the letter exactly.
- Header: full legal name, address, date
- Recipient block: name, title, address
- One-line purpose statement
- Factual body, signature line, printed name, date
- 3 to 4 inches of blank space reserved for the notary block
Pro Tip: If your document is for something specific, like a child travel consent letter, check the requesting agency’s template first. Theonlinenotary can review your draft before your appointment and flag missing space for the certificate.
Key Takeaways
A notarized letter is accepted or rejected based on three things: correct component order, the right certificate type, and enough reserved space for the notary’s seal and signature.
| Point | Details |
|---|---|
| Follow the standard layout | Header, purpose line, factual body, signature block, then 3 to 4 inches reserved for the notary certificate. |
| Match the certificate to the need | Use an acknowledgment for identity verification, a jurat for sworn statements. |
| Never sign in advance | Sign only in the notary’s presence, and bring government-issued photo ID matching the document name. |
| Confirm requirements first | Ask the recipient which certificate type and wording they expect before your appointment. |
| Book with Theonlinenotary | Complete affidavits, declarations, and consent letters online in Ontario without an office visit. |
Table of Contents
- What Goes Into a Notarized Letter, Section by Section
- Acknowledgment or Jurat: Which Certificate Do You Need?
- How Do You Prepare for a Notary Appointment?
- What Mistakes Get Notarized Letters Rejected?
- Where Should the Notary Block Go on the Page?
- Two Ready-to-Use Notarized Letter Templates
- What Do Notarizations Cost and How Long Do They Take?
- Why Getting the Format Right Actually Matters
- Book Your Notarization With Theonlinenotary
- Where to Find Official Templates and Guidance
- Sources
What Goes Into a Notarized Letter, Section by Section
A notarized letter isn’t a legal essay. It’s a structured document, closer to a business letter than anything else, and each piece exists for a reason a notary or recipient will actually check.
The header needs your full legal name exactly as it appears on your ID, your current address, and the date. Below that, list the recipient’s name, title, and address, even if you’re handing the letter to them directly. This isn’t decoration. A notary comparing your printed name against your driver’s license will hesitate over “Mike” when your ID says “Michael,” and that hesitation can end the appointment.
The opening line should state the letter’s purpose in one sentence. “I, Jane Alvarez, authorize my sister to pick up my child from school on my behalf” tells the reader exactly what they’re looking at before they read another word.
The body stays factual and chronological. Include dates, dollar amounts, addresses, or case numbers wherever they apply. Skip the persuasive language. A notarized letter is a record, not an argument.
The signature block needs a blank line for your signature, your printed name below it exactly as it appears on your ID, and the date. Below that, leave the 3 to 4 inches of blank space the notary will fill in.
A few formatting basics matter more than people expect:
- Use a standard business letter layout with a readable font (nothing decorative)
- Print single-sided, and number pages if the letter runs more than one
- Note clearly where the certificate block belongs if it’s on a separate page
Pro Tip: If your recipient expects a specific statutory certificate, print it as a separate attached page rather than squeezing it onto your letter. It’s cleaner, and it avoids a notary running out of room.
Acknowledgment or Jurat: Which Certificate Do You Need?
An acknowledgment confirms you appeared before the notary and signed voluntarily. A jurat confirms you swore or affirmed that the contents of the document are true. Get the wrong one attached to your letter, and it can be rejected outright.
Acknowledgments show up on documents like powers of attorney, real estate deeds, and most identity-verification forms, where the notary’s job is confirming who signed, not what they said. Jurats belong on affidavits and sworn statements, where the truth of the content is the whole point.
Here are two sample blocks, written in commonly used language. Treat them as a starting point, not the final word.
Acknowledgment sample:
State/Province of _______, County/Region of _______ On this ___ day of _____, 20, before me personally appeared [Name], known to me or satisfactorily proven to be the person whose name is subscribed to the foregoing instrument, and acknowledged that they executed the same for the purposes stated.
Jurat sample:
State/Province of _______, County/Region of _______ Sworn to (or affirmed) and subscribed before me this ___ day of _____, 20, by [Name].
Exact statutory wording varies by state and province, and many jurisdictions require the certificate text itself to be in English regardless of the letter’s language.
Warning: Never assume one certificate type works everywhere. Ask the recipient which one they require before your appointment, not after.
Pro Tip: When a document contains sworn factual claims and you’re unsure which certificate fits, the jurat is usually the safer default.
How Do You Prepare for a Notary Appointment?
Most rejected appointments come down to preparation gaps, not paperwork errors. Here’s the sequence that avoids them:
- Gather valid, government-issued photo ID with a name that matches your document exactly.
- Bring the document unsigned. Do not sign it beforehand.
- Bring any supporting documents or witness information the recipient requires.
- Confirm the notary’s accepted payment method for the fee.
- Arrive (or log in) at the scheduled time with everything ready.
The signing rule is simple: sign only in the notary’s presence. Some acknowledgments technically allow prior signing if you can verbally confirm the signature is yours, but treat that as the exception, not the plan. Bringing a pre-signed document is one of the fastest ways to get turned away.
Remote online notarization is legal in a growing number of jurisdictions and works well for people who can’t easily get to an office. If that route fits your situation, Theonlinenotary’s guide on preparing for an online notary appointment walks through the technical checklist and ID upload process.
Pro Tip: Test your camera and ID scan quality before a virtual session starts. A blurry photo ID is the number one reason online appointments get delayed.
In-person appointments typically run same-day. Remote sessions depend on scheduling and platform availability, which is worth factoring in if you’re working against a deadline.
What Mistakes Get Notarized Letters Rejected?
Run through this list before you leave the house or log into your appointment:
- Your name on the letter doesn’t match your ID (nicknames, missing middle initials, and hyphenated last names are the usual culprits)
- The letter is missing a certificate block or has the wrong wording for your recipient
- You already signed the document before arriving
- There isn’t enough blank space at the bottom for the seal and signature
A second wave of problems shows up less often but still causes rejections:
- Wrong certificate type attached (a jurat where an acknowledgment was needed, or vice versa)
- Handwritten edits on the document that weren’t initialed
- Missing an apostille or certified true copy the recipient specifically asked for
Fix all of it before your appointment: use your full legal name exactly as it appears on ID, attach the correct blank notary block, and call the recipient ahead of time to confirm which certificate they expect.
Where Should the Notary Block Go on the Page?
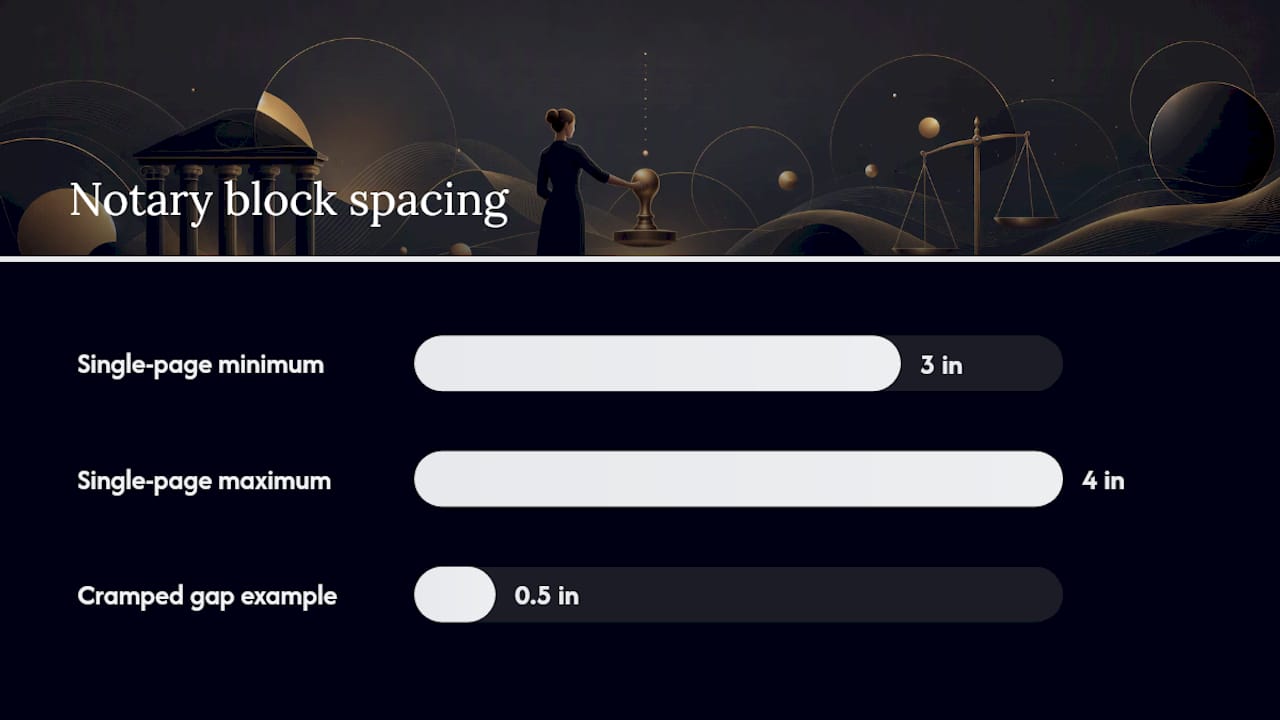
On a single-page letter, leave roughly 3 to 4 inches of blank space at the bottom, or attach a separate notarial certificate page if your letter is already full.
Multi-page documents need a bit more care:
- Number every page
- Sign the final page only in the notary’s presence
- Place the certificate on the final page, or attach it as its own sheet labeled “Notarial Certificate”
The stamp and signature themselves need visible space too, including the commission expiration date, which some recipients check specifically.
A notary who has to cram a seal into a half-inch gap at the bottom of a crowded page isn’t going to make it fit. Leave the room before you show up, not after.
Pro Tip: When in doubt about space, attach the certificate as a separate page. It’s easier to staple an extra sheet than to explain to a bank why your seal is smudged into the signature line.
Two Ready-to-Use Notarized Letter Templates
Template 1: Authorization or consent letter (acknowledgment)
Use this for permission letters, such as authorizing someone to act on your behalf or consenting to a minor’s travel.
- Header: your full name, address, date
- Recipient block: name, address (if applicable)
- Purpose line: “I, [Name], authorize [Name] to [action] on my behalf.”
- Body: relevant dates, addresses, or details in plain language
- Signature block: blank line, printed name, date
- Reserved space: leave 3 to 4 inches blank for the notary’s acknowledgment certificate
Template 2: Sworn statement or affidavit (jurat)
Use this when you need to swear that facts stated in the document are true, which usually calls for an affidavit rather than a simple letter. Theonlinenotary’s breakdown of affidavit types covers common variations.
- Heading: “Affidavit of [Name]” or “Sworn Statement”
- Body: numbered factual statements, written in first person
- Closing line: “I declare under penalty of perjury that the foregoing is true and correct.”
- Signature block left blank until your appointment
| Template | Certificate needed | Best used for |
|---|---|---|
| Authorization letter | Acknowledgment | Permission letters, consent letters |
| Sworn statement | Jurat | Affidavits, sworn factual declarations |
Before you print either one, confirm with the recipient which certificate type they actually require. That one phone call saves a second trip to the notary.
What Do Notarizations Cost and How Long Do They Take?
In-person notarization fees commonly start around $25 per document, though rates vary by provider and region. Online notarization fees are usually structured differently and can run higher, particularly for services like remote will signing that involve more verification steps.
- In-person appointments: typically completed same-day
- Remote sessions: timing depends on scheduling and platform availability
- Multiple documents in one sitting can affect both the fee and the time needed
Pro Tip: Always confirm with the receiving institution, whether it’s a bank, court, or government office, exactly which certificate type and formatting they expect before your appointment. Rework after the fact costs more than a five-minute phone call up front.
Why Getting the Format Right Actually Matters
Banks, courts, and government offices process thousands of these letters, and a document with the wrong certificate block or no reserved notary space gets bounced back before anyone reads the content. Clean formatting isn’t about looking professional. It’s about not getting sent home.
Worth remembering: a notary confirms your identity and your signature. They don’t edit your wording or vouch for your document’s legal sufficiency. For anything with real stakes, an estate matter, a large financial transaction, get the language checked by the recipient or a lawyer before you sit down to notarize.
Book Your Notarization With Theonlinenotary
Skip the trip to an office. Theonlinenotary handles affidavits, statutory declarations, invitation letters, and remote witnessing for wills and powers of attorney entirely online for Ontario residents, with in-person appointments available in Brampton for certified true copies.

Before you book, have your document drafted (unsigned), your government-issued photo ID ready, and a clear idea of which certificate type your recipient needs, Theonlinenotary can help confirm that if you’re unsure. Appointments run online with real notaries and commissioners, no office visit required for most documents. Book your appointment through the services page and get your letter notarized on your schedule instead of theirs.
Where to Find Official Templates and Guidance
For jurisdiction-specific wording, start with government sources rather than generic templates:
- Ontario’s guidance on becoming a notary public for layout and certificate space standards
- Government of Canada’s consent letter guidance for travel-related notarized letters
- Free notarial statement generator for sample acknowledgment and jurat wording
For a full walkthrough of the remote process, Theonlinenotary’s guide on preparing for online notarization covers the technical steps in detail.
This article is general information, not a substitute for advice from a qualified lawyer. Consult a qualified legal professional about your own circumstances before acting on anything here.
Sources
- How to become a notary public — Ontario (Lawyers and Paralegals)
- How to Write and Get a Letter Notarized: Free Template - LegalClarity
- How to write a notarized letter | PandaDoc
- Free Notarial Statement Generator | Florida Translate