How to Validate a Digital Notary: Quick Technical Checklist

TL;DR:
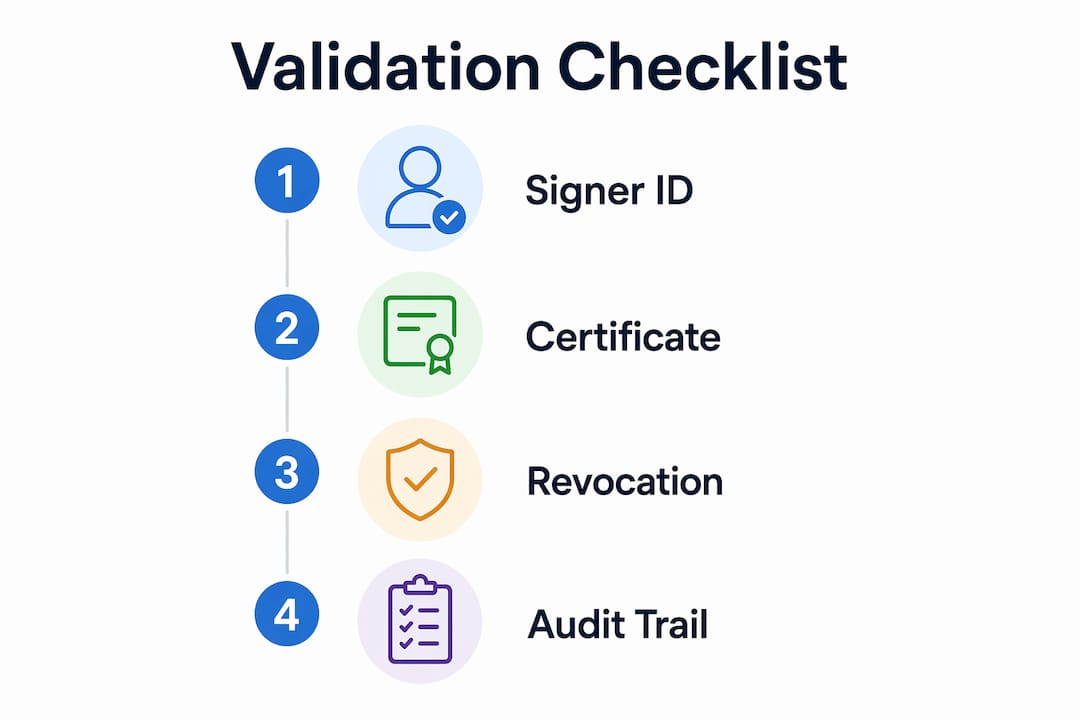
- Validating a digital notary requires checking the certificate, audit trail, signer identity proofing, and state notary registry.
- All four checks must pass before trusting a remotely notarized document as legally reliable.
You can validate a digital notary by checking four things: the document’s embedded digital certificate, the notarization audit trail, the signer identity evidence, and the issuing state’s notary registry. All four checks must pass before you treat a remotely notarized document as legally reliable.
Here is the minimum checklist to confirm or reject a remote online notarization (RON):
- Certificate valid: Open the PDF in Adobe Acrobat Reader and confirm the signature panel shows a green checkmark or “Signature is valid.” No green checkmark means investigate further.
- Chain of trust resolves: Click into the certificate details and confirm the issuing certificate authority (CA) chains up to a recognized root. A warning triangle alone does not mean fraud, but it does require a closer look.
- Audit trail present: The document should include a verification code, portal link, or attached audit-trail log showing timestamped signer authentication events.
- State commission confirmed: Look up the notary’s name and commission number in the issuing state’s notary registry and confirm the notary holds active RON authorization.
Quick verdict: All four pass? Proceed. One or two flags? Verify further before relying on the document. Certificate revoked at signing time or audit trail missing entirely? Reject and escalate.
Table of Contents
- What a digitally notarized document actually looks like
- How to validate a digital notary: step-by-step verification
- How signer identity is verified in RON and what evidence to expect
- The cryptographic verification: what chain-of-trust and revocation really mean
- How to confirm the notary was authorized to perform RON in the claimed state
- How vendor verification portals work and what they show you
- Red flags to watch for and what to do when verification fails
- Practical verification checklist and email template
- Key Takeaways
- What most people get wrong about digital notary verification
- Theonlinenotary: remote notarization with a clear audit trail
- Useful sources and verification tools
What a digitally notarized document actually looks like
Before you can verify anything, you need to know where to look. A properly executed RON package is not just a signed PDF. It carries several layers of embedded evidence.
Visible elements to locate when you open the file:
- Signature panel: In Adobe Acrobat Reader, a blue or purple ribbon appears at the top of the document, or a signature block is visible on the signature page. Click it to open the Signatures panel on the left sidebar.
- Notary seal or statement: A graphical seal image and a typed notarial certificate block appear on or near the signature page, showing the notary’s name, commission number, commission expiration, and the state of commission.
- Embedded certificate metadata: Right-click the signature in the Signatures panel and select “Show Signature Properties.” You will see the signer’s name, the signing time, the certificate issuer, and the serial number.
- Audit trail or verification code: Many RON platforms stamp a unique verification code or a portal URL directly onto the last page of the document. This code retrieves the full transaction log from the vendor’s server.
- Notarization timestamp and session metadata: The certificate properties window shows the claimed signing time. If a qualified timestamp is embedded, it will appear under “Date/Time” with a separate timestamp authority listed.
Where to find the signature panel in Adobe Acrobat Reader: open the document, go to View → Show/Hide → Navigation Panes → Signatures. The panel lists every signature in the document. Click any entry to expand it and see the signer name, signing time, and certificate issuer at a glance.
Pro Tip: If the document has multiple signatures (signer plus notary), verify each one separately. The notary’s certificate and the signer’s certificate are distinct entries in the Signatures panel, and both must be valid.
Vendors package their verification evidence differently. Some embed a QR code that opens a portal. Others include a plain-text access code at the bottom of the document. A few attach the full audit-trail PDF as an appendix. Check all three locations before concluding that no audit trail exists.

How to validate a digital notary: step-by-step verification
Follow these steps in order. Skipping ahead, especially past the certificate chain check, is where most verification errors happen.
- Open the file in Adobe Acrobat Reader. Free versions perform the same PKI checks as paid ones for signature validation. Avoid browser-based PDF viewers for this task; they do not expose full certificate details.
- Inspect the signature panel. Go to View → Show/Hide → Navigation Panes → Signatures. Confirm the notary’s signature entry shows “Signature is valid” in green. A yellow warning triangle means the certificate chain is not locally trusted, not necessarily that the document was altered. A red X means the document was modified after signing.
- View the certificate details. Right-click the notary’s signature entry → Show Signature Properties → Show Certificate. Note the issuing CA, the serial number, and the validity period. The certificate must have been valid at the time of signing.
- Check the certificate chain and revocation. In the Certificate Viewer, click the “Revocation” tab. PDF readers automatically perform CRL and OCSP checks to confirm the certificate was not revoked. If revocation status shows “Unknown,” the reader could not reach the revocation server; request the vendor’s validation report instead.
- Confirm the timestamp. If a qualified timestamp is present, it appears as a separate entry in the Signatures panel labeled “Timestamp.” A timestamp from a recognized timestamp authority (TSA) proves the document existed in its current form at that moment, independent of the certificate’s later expiration or revocation.
- Review the audit trail. Use the verification code or portal link in the document to retrieve the transaction log. Look for timestamped entries showing: signer authentication method (KBA, ID verification, or biometric), session start and end times, IP address and device information, and the notary’s credential review event.
- Confirm the notary’s commission and RON authorization. Look up the notary’s name and commission number in the issuing state’s notary administrator database. Confirm the commission was active on the date of notarization and that the notary holds any required RON platform registration or authorization.
- Record your evidence. Screenshot the Signatures panel, export the audit-trail PDF from the vendor portal, and save the state registry result. Store these with the notarized document.
Pro Tip: A yellow warning triangle in Acrobat almost always means the CA root is not in Adobe’s Trusted Identity List (ATIL), not that the document was tampered with. Inspecting the certificate properties and confirming the issuing CA is a recognized notary platform CA is usually enough to resolve the warning. If you cannot confirm the CA, request the vendor’s validation report.
If any step fails, jump to Section 8 for troubleshooting. If all steps pass, you have a verified RON package. You can also download the one-page checklist template in Section 9 to run through these steps systematically.
How signer identity is verified in RON and what evidence to expect
A valid digital certificate proves the document was not altered. It does not, by itself, prove the right person signed it. That is what identity proofing does, and the audit trail is where you confirm it happened correctly.
RON platforms use three main identity-proofing methods, often in combination:
- Knowledge-Based Authentication (KBA): The signer answers five questions compiled from sources like credit reports and transaction history. Questions are dynamically generated and time-limited. KBA is the most common first-layer check for domestic signers.
- Government ID verification (IDV): The signer photographs or uploads a government-issued ID. The platform uses machine learning to analyze the document for authenticity, extracts data via OCR, and compares a live selfie or video frame to the ID photo. The notary reviews and records the credential analysis in the electronic journal.
- Live video biometric comparison: During the RON session, the notary visually confirms the signer’s face matches the ID on screen. Some platforms record the full session video as part of the audit trail.
- One-time passcode (OTP): A code sent to the signer’s registered mobile number or email confirms device possession. This is typically a secondary layer, not a standalone identity check.
What to look for in the audit trail:
- A timestamped KBA completion event, showing pass/fail status (not the actual answers, which are never stored)
- ID type, issuing country or state, and a partial ID number (last four digits, typically)
- A notation that the notary reviewed and accepted the credential
- Session recording reference or screenshot of the ID match result
- OTP delivery and confirmation timestamp, if used
Pro Tip: KBA is not infallible. A soft-match or a signer who barely passes on a second attempt is worth flagging. If the audit trail shows a KBA retry or a manual override by the notary, ask the issuing party for the full session recording before accepting the document for a high-stakes transaction.
When a notary relies on personal knowledge of the signer or uses a credible witness instead of KBA/IDV, the audit trail should include a written notation explaining that basis. The National Notary Association notes that personal knowledge and credible witnesses are recognized identification methods under many state RON statutes, but the notary must document the basis in the journal entry. If that notation is absent, treat it as a gap requiring clarification.
The cryptographic verification: what chain-of-trust and revocation really mean
Most people stop at “the signature is valid.” Practitioners go further, because a mathematically correct signature can still be operationally unverifiable if the chain does not resolve or the revocation history is incomplete.
Under ETSI EN 319 102-1, signature validation follows five distinct stages, each of which yields its own result (valid, invalid, or indeterminate):
- Stage 1 — Document integrity: The PDF reader recomputes the document hash and compares it to the hash stored in the signature. A mismatch means the document was altered after signing. This is the only stage most people check.
- Stage 2 — Certificate chain resolution: The reader traces the signing certificate up through intermediate CAs to a trusted root. If the chain breaks or the root is not trusted locally, the result is “indeterminate,” not necessarily “invalid.” Trust anchors must be present on the verifier’s machine.
- Stage 3 — Revocation status at signing time: The reader checks whether the certificate was revoked at the moment of signing, not just today. CRL or OCSP checks confirm this. A certificate revoked after signing is still valid for that signature; one revoked before or during signing is not.
- Stage 4 — Algorithm policy at signing time: The cryptographic algorithm used (e.g., SHA-256 with RSA-2048) must have been considered acceptable at the time of signing. Algorithms deprecated after signing do not retroactively invalidate a signature, but algorithms already deprecated at signing time do.
- Stage 5 — Signing-time validation: A qualified timestamp from a recognized TSA anchors the claimed signing time. Without it, the claimed time is just an assertion. With it, the time is cryptographically provable and supports long-term verifiability even after the signing certificate expires.
Operational failures at Stages 3 and 5 are more common in real audits than simple hash mismatches. Missing timestamp proofs and gaps in historical revocation records are the issues that most often make a signature “indeterminate” rather than cleanly valid.
How to view this in Adobe Acrobat Reader: Open Signature Properties → Show Certificate → navigate the tabs for “Revocation,” “Details,” and “Trust.” The “Trust” tab shows whether the root CA is in the ATIL. The “Revocation” tab shows the last CRL/OCSP check result and the check time.

Pro Tip: If the revocation check returns “Unknown” and the document is being used in a legal or financial context, do not guess. Request the vendor’s signed validation report, which is generated server-side at the time of notarization and includes the revocation status captured at signing. That report is more reliable than a client-side check performed months later.
How to confirm the notary was authorized to perform RON in the claimed state
A notary’s commission is state-specific, and RON authorization is an additional layer on top of the base commission. A notary commissioned in one state may not be authorized to perform RON in another, and a commission that was valid at the time of notarization may have since expired or been revoked.
What to look up in the state registry:
- Notary’s full legal name (must match the name on the notarial certificate exactly)
- Commission number (must match the number in the digital certificate and the notarial statement)
- Commission expiration date (must be after the date of notarization)
- RON authorization or platform registration, where the state requires it
- Any disciplinary actions or commission suspensions
Steps to perform a state registry lookup:
- Identify the state of commission from the notarial certificate block in the document.
- Go to that state’s Secretary of State or notary administrator website and find the notary search tool.
- Search by the notary’s name or commission number.
- Screenshot the result showing commission status, expiration date, and any RON authorization fields.
- Compare the registry result to the notarial certificate in the document. Any mismatch in name, commission number, or expiration date is a red flag.
Most states publish their notary registries online. Some, like Texas and Florida, include a specific field for RON platform authorization. Others, like Virginia, require notaries to register with the state before performing RON. If the state registry does not show RON authorization and the state requires it, the notarization may be invalid regardless of the certificate status.
A notary’s commission in State A does not authorize RON in State B, even if the signer is physically located in State B. The notarization is governed by the law of the state where the notary is commissioned. Always verify in the notary’s home state, not the signer’s location.
How vendor verification portals work and what they show you
Most major RON platforms embed a verification code or portal link directly in the notarized PDF. This is your fastest path to the full audit trail, and it bypasses the need to interpret raw certificate data.
What a vendor verification portal typically shows:
- A timeline of all authentication events, with UTC timestamps
- Signer identity-proofing results (KBA pass/fail, IDV result, OTP confirmation)
- Document hash at the time of notarization (compare this to the hash in the PDF signature)
- Certificate details for each signer and the notary
- Session metadata: IP addresses, user agent strings, and device type for each participant
- Notary’s credential review notation and eJournal entry reference
How to use a verification code:
- Locate the verification code or portal URL on the last page of the notarized PDF.
- Navigate to the vendor’s verification portal (the URL is usually printed alongside the code).
- Enter the code. The portal returns the full transaction record for that specific notarization session.
- Compare the document hash shown in the portal to the hash in the PDF’s signature properties. They must match.
Platforms provide an on-demand verification portal or a verification code stamped into the document that links directly to the transaction audit trail and signer authentication events.
Pro Tip: Export the portal output as a PDF immediately after retrieving it. Some vendor portals have session timeouts or retention limits. A saved PDF of the portal output, timestamped by your browser, is admissible evidence in most dispute contexts. Cross-check the portal’s listed signing time against the timestamp in the PDF signature panel — they should match within seconds.
For documents used in immigration or citizenship processes, the audit trail from the vendor portal can be especially important. Affidavits used in citizenship applications often require demonstrable identity-proofing evidence, and a vendor portal export provides exactly that documentation.
Red flags to watch for and what to do when verification fails
Not every failure means fraud. Some failures mean the document needs more investigation. Knowing the difference saves time.
Red flags that require immediate action:
- Signature shows “Invalid” (red X) in Acrobat — document was modified after signing
- Certificate was revoked at or before the signing time
- Notary name in the certificate does not match the name on the notarial certificate block
- Commission number in the document does not match the state registry
- No audit trail, verification code, or portal link anywhere in the document
- KBA or IDV evidence is absent from the audit trail for a session that claims those methods were used
- Timestamps in the audit trail are inconsistent with the signing time in the certificate
- Commission was expired on the date of notarization
Troubleshooting steps when something fails:
- Capture all evidence first. Screenshot the error, the Signatures panel, and the certificate details before doing anything else.
- Try trusting the CA root for testing purposes only. In Acrobat, you can manually add a CA to your trusted list to see if the chain resolves. Do this in a test environment and do not treat a successful result as final validation without independent confirmation.
- Request the vendor’s validation report. Contact the RON platform’s support team with the document’s verification code. Ask for a server-generated validation report that includes the revocation status captured at signing time.
- Contact the issuing notary. Request a copy of the eJournal entry for the session, the session recording (if available), and the notary’s commission certificate.
- Contact the issuing state’s notary administrator. File a formal inquiry if the commission details do not match or if RON authorization cannot be confirmed.
- Seek legal counsel. If the document is being used in litigation, a real estate transaction, or a government filing, and verification fails, do not proceed without legal advice.
What to include when escalating:
- A copy of the notarized PDF
- Screenshots of the signature validation panel and certificate details
- The verification code and any portal output you retrieved
- The state registry screenshot showing commission status
- A written summary of which specific checks failed and what the error messages said
Practical verification checklist and email template
One-page verification checklist
Before you start:
- Confirm you have the original notarized PDF (not a printout or scan of a printout)
- Open the file in Adobe Acrobat Reader (not a browser viewer)
Certificate checks:
- [ ] Signature panel shows “Signature is valid” (green) or warning triangle (investigate further)
- [ ] Certificate was valid on the date of notarization
- [ ] Certificate chain resolves to a recognized CA root
- [ ] Revocation status at signing time: not revoked
- [ ] Qualified timestamp present and from a recognized TSA (if applicable)
Audit trail checks:
- [ ] Verification code or portal link located in the document
- [ ] Portal accessed and transaction record retrieved
- [ ] Signer KBA/IDV/biometric evidence present in the audit trail
- [ ] Document hash in portal matches hash in signature properties
- [ ] Session timestamps are internally consistent
State registry checks:
- [ ] Notary name matches the notarial certificate exactly
- [ ] Commission number matches
- [ ] Commission was active on the date of notarization
- [ ] RON authorization confirmed (where state requires it)
Evidence preservation:
- [ ] Signatures panel screenshot saved
- [ ] Vendor portal output exported as PDF
- [ ] State registry result screenshot saved
- [ ] All files stored with the notarized document
Email template to request verification records
Subject: Verification request — notarized document [Document Name / Reference Number]
Dear [Notary Name / Issuing Party / Platform Support],
I am writing to request verification records for a notarized document I received on [Date of Notarization]. The document references the following:
- Notary name: [As shown on the notarial certificate]
- Commission number: [As shown on the notarial certificate]
- Verification code: [From the document, if present]
- Document description: [Brief description, e.g., “Affidavit of Support, signed by [Signer Name]”]
I am requesting the following:
- A server-generated validation report confirming the document hash, certificate status, and revocation status at the time of signing.
- The audit-trail export for the notarization session, including signer authentication events and timestamps.
- Confirmation of the notary’s RON authorization in [State] as of [Date of Notarization].
- A copy of the eJournal entry for this session, if available.
Please respond to [Your Name / Your Organization] at [Your Email / Contact Information] within [Timeframe, e.g., 5 business days].
I have attached a copy of the notarized document and screenshots of the signature validation panel for reference.
Thank you, [Your Name] [Your Organization] [Contact Information]
Adapting this template for business or legal teams: Replace the signer name with a case or matter reference number. Add your organization’s document retention policy reference in the closing paragraph. For legal proceedings, copy your counsel on the request and note that the records may be used as evidence.
Key Takeaways
Validating a digital notarization requires checking the cryptographic certificate, the audit trail, the signer identity evidence, and the issuing state’s notary commission — all four, not just one.
| Point | Details |
|---|---|
| Open in a trusted reader | Use Adobe Acrobat Reader, not a browser viewer, to access full certificate and revocation details. |
| Chain of trust matters | A warning triangle means the CA root is not locally trusted, not that the document was tampered with — inspect the certificate before concluding. |
| Audit trail is the identity proof | The vendor portal or verification code retrieves signer authentication events (KBA, IDV, biometric) that the certificate alone cannot confirm. |
| State registry is non-negotiable | Confirm the notary’s commission and RON authorization in the issuing state on the date of notarization — a commission in one state does not authorize RON in another. |
| Theonlinenotary for your RON needs | For individuals and businesses in Ontario needing remote notarization of affidavits, statutory declarations, and more, Theonlinenotary provides a fully documented RON process with a clear audit trail. |
What most people get wrong about digital notary verification
The conventional wisdom is that a green checkmark in Adobe Acrobat means the document is verified. That is half right, at best. The checkmark confirms the document was not altered after signing. It says nothing about whether the right person signed it, whether the notary was actually commissioned to perform RON, or whether the identity-proofing steps were completed correctly.
The checks that actually matter in a dispute are the ones most people skip: the historical revocation status at signing time, the audit-trail evidence of KBA or IDV completion, and the state registry confirmation of RON authorization. These are the checks that hold up when a document is challenged in court or rejected by a government agency.
State differences compound the problem. RON laws vary significantly across US states, and a notarization that is perfectly valid under one state’s rules may be unenforceable under another’s. The notary’s commission state governs the notarization, not the signer’s location. Many people assume the opposite, and that assumption has caused real problems in real estate closings and immigration filings.
Preserving evidence is the step that almost everyone skips until it is too late. The vendor portal may not retain records indefinitely. State registry records change when commissions expire. The time to save screenshots, export the audit trail, and record the state registry result is the day you verify the document, not six months later when someone questions it.
For anyone working with digital notary security on a regular basis, building a standard verification checklist into your document intake process is worth the one-time setup cost.
Theonlinenotary: remote notarization with a clear audit trail
If you have just worked through this checklist and realized you need a notarized document done right the first time, Theonlinenotary offers remote online notarization for affidavits, statutory declarations, solemn declarations, invitation letters, and remote will and power of attorney signings for individuals and businesses in Ontario. Every session produces a documented audit trail, a signed PDF with embedded certificate metadata, and a clear record of the identity-proofing steps performed.

The difference between a document that passes verification and one that gets rejected often comes down to how the notarization was conducted in the first place. Theonlinenotary’s process is built around the same checkpoints this article describes: verified signer identity, a complete session record, and a notary whose commission is current and properly authorized. You can review the full range of notarization services and book a remote appointment directly online. For a closer look at which document types qualify, the document types guide covers the most common categories in detail.
This article is general information about digital notarization verification practices and does not constitute legal advice. Confirm current rules with the relevant state notary administrator or a qualified legal professional for your specific situation.
Useful sources and verification tools
PDF readers and certificate inspection:
- Adobe Acrobat Reader (free) — the standard tool for signature panel inspection, certificate chain viewing, and CRL/OCSP revocation checks
- National Notary Association — notary technology overview — background on eSeals, eSignatures, and digital certificates used in notarization
Identity proofing and RON workflows:
- National Notary Association — identifying signers for RON — authoritative guidance on KBA, IDV, and credible witness methods under US state RON statutes
Cryptographic validation standards:
- ETSI EN 319 102-1 — the five-stage signature validation framework referenced in Section 5; available from the ETSI standards portal
State notary registries (examples):
- Texas Secretary of State — Notary Public Search
- Florida Department of State — Notary Public Search
- Virginia Secretary of the Commonwealth — Notary Search
- For other states, search “[State] Secretary of State notary search” to locate the official lookup tool
Vendor verification portals:
- Most RON platforms (including those used by commissioned notaries) publish a verification portal URL in the notarized document. Enter the verification code from the document’s last page to retrieve the full audit trail.
Preserving verification evidence:
- ProDigiSign — how to verify a digital signature — practical guidance on saving verification output and building a preservation record